
Ubuntu 18.04 is different with phpIPAM
But no panic, the changes for the phpIPAM installation are not that big.
Install Ubuntu server
Just run through a simple bare minimum installation of Ubuntu server. Where i just aded the following packages.
sudo apt-get install ntp open-vm-tools unzip tasksel
sudo tasksel install opens-server
Install and prepare the LAMP stack
This will install automatically php-7.2, the only exception will be php-mcrypt that we need to install as version 7.1.
sudo apt-get install apache2 mariadb-server php php-pear php-gmp php-mysql php-mbstring php-gd php-curl
sudo add-apt-repository ppa:ondrej/php
sudo apt-get install php7.1-mcrypt
Configure the Apache webserver
Open with your favorite editor /etc/apache2/apache2.confand the following configuration the the file.
<Directory "/var/www/html">
  Options FollowSymLinks
  AllowOverride all
  Order allow,deny
  Allow from all
</Directory>
Now enable the apache url_rewrite module.
sudo a2enmod rewrite
And restart the apache daemon.
sudo systemctl restart apache2
Download the phpIPAM code bits
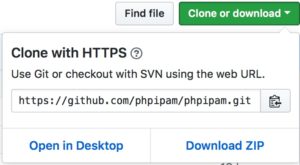
Because im not THAT big fan to have developer tools on a production or lab-system, without a good reason. I will not follow the official guide to use GIT. Just open the phpIPAM Git repository, click on the green “Clone or download“. And through right click on the “Download Zip” button, you get the download link.
cd
wget https://github.com/phpipam/phpipam/archive/master.zip
sudo unzip master.zip -d /var/www/html && sudo mv /var/www/html/phpipam-master/* /var/www/html/phpipam-master/.* /var/www/html/

sudo rm -rf /var/www/html/phpipam-master /var/www/html/index.html master.zip
Prepare the phpIPAM config file, and database connection details.
sudo cp /var/www/html/config.dist.php /var/www/html/config.php
And change at least the password for the database connection in the file /var/www/html/config.php.
$db['host'] = 'localhost';
$db['user'] = 'phpipam';
$db['pass'] = '<YOUR PASSWORD>';
$db['name'] = 'phpipam';
$db['port'] = 3306;
Finaly we need to set right file and folder permissions.
sudo chown www-data:www-data -R /var/www/html/
sudo find /var/www/html/ -type f -exec chmod 0644 {} +
sudo find /var/www/html/ -type d -exec chmod 0755 {} +
The MySQL part
Set a password and run through the security configuration of MySQL
If MySQL ist not running, just start the daemon.
sudo /etc/init.d/mysql restart
Then run MySQL security and install script, and use the default settings.
sudo mysql_secure_installation
![]() And now we reached the small but important bug in the installation guide.
And now we reached the small but important bug in the installation guide.
Since Ubuntu 16.04, the usage of the “root“@”localhost” to login to MySQL is only possible when you are root or using sudo. Otherwise your login attempts will get a “access denied”. And this will happen when you flow the Ubuntu 17.04 guide form the phpIPAM page.

So we use the manual database installation
Login with the “root” to MySQL. And do not forget to replace <YOUR PASSWORD>, with the password you have specified in “/var/www/html/config.php“!
sudo mysql -u root -p

mysql> create database phpipam;
mysql> GRANT ALL on phpipam.* to phpipam@localhost identified by "<YOUR PASSWORD>";
mysql> exit
As last step we import the sql-schema of phpIPMA, and the we are done with the MySQL part.
sudo mysql -u root -p phpipam < /var/www/html/db/SCHEMA.sql
Now selection option 3 “Manual database installation”

And go strait to Option 4 “login“.
Finished
Open the login page, use the defaults “Admin/ipamadmin” to login. And after the you passed the change password screen you have a running phpIPAM.
http://<ip or dnsname>/